YouTube Live has several setup paths: mobile, webcam, or an encoder such as OBS Studio. The right path depends on the content, device, network, and controls you need. This guide covers channel verification, first-stream setup, OBS basics, moderation, and the checks to make after a stream.
Last updated: 20 August 2026. Check the current platform terms and official rules before acting.
1. Check YouTube’s current eligibility
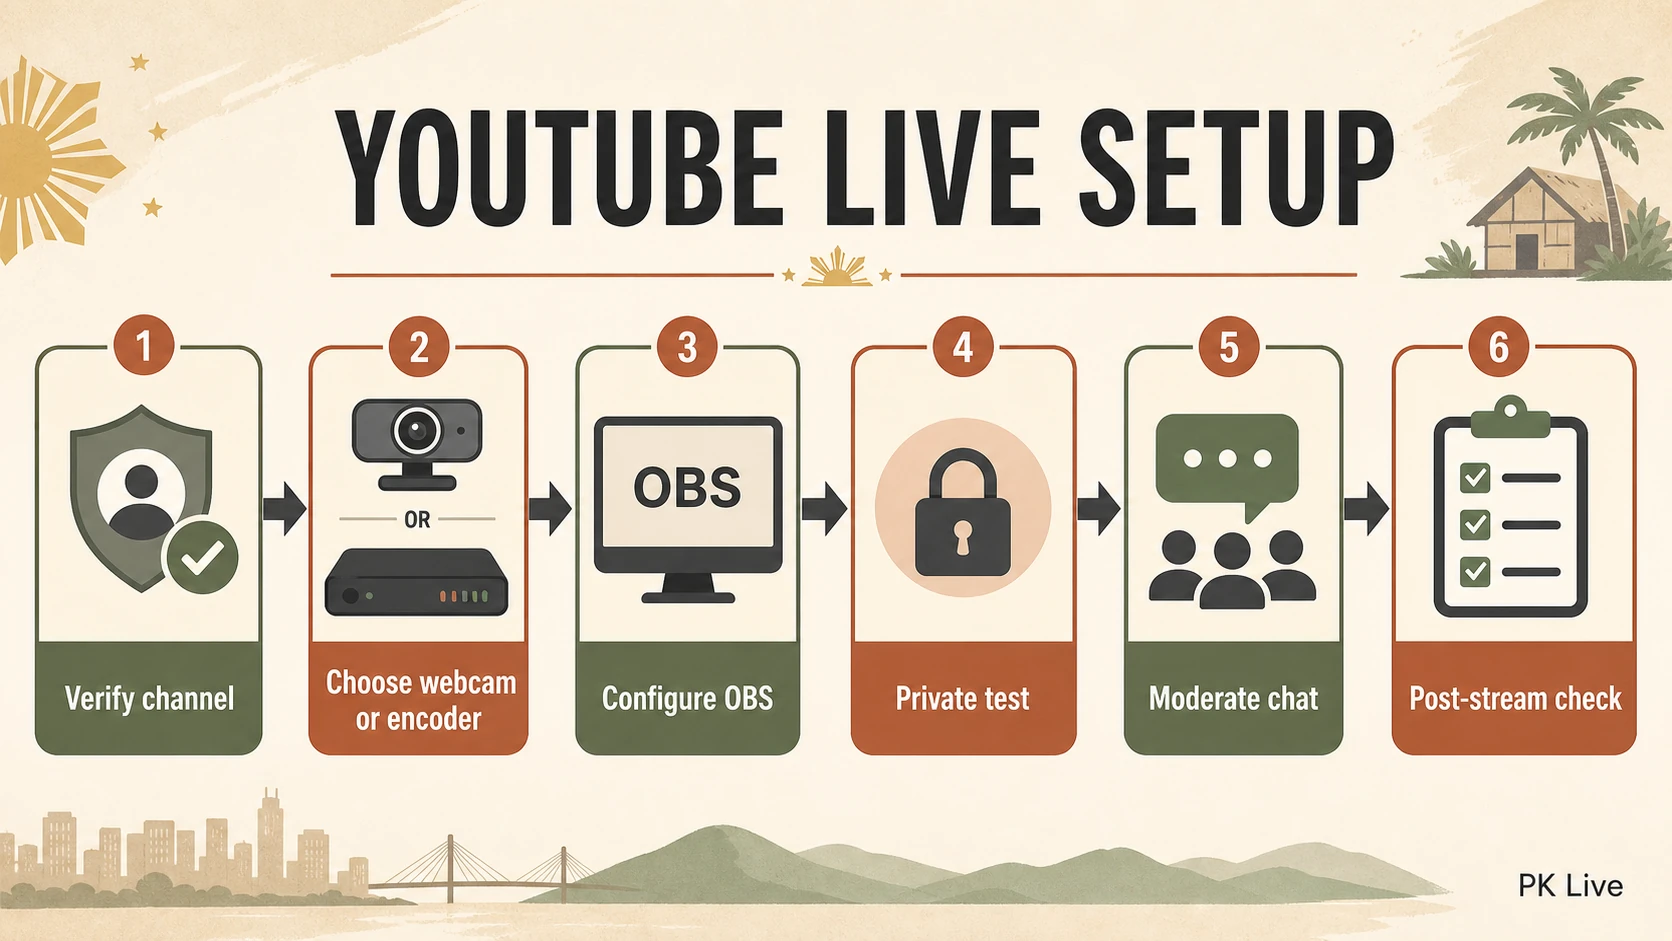
YouTube’s current help documentation says a channel needs verification and no live-streaming restrictions in the previous 90 days. It also states that the minimum age to live stream is 16. First-time live-stream activation can take up to 24 hours, so complete this step before the event rather than just before going live.
Use YouTube’s live-streaming help page for the current requirements. Rules can change, and an account may have additional restrictions based on its history or content.
2. Choose mobile, webcam, or encoder
| Method | Useful for | Check first |
|---|---|---|
| Mobile | Short updates, vlogs, and simple outdoor streams | Account eligibility, battery, data, location privacy |
| Webcam | Talking-head streams from a computer | Camera framing, microphone, browser permissions |
| Encoder | Gameplay, overlays, multiple sources, and advanced audio | Stream key security, encoder settings, upload stability |
3. Set up OBS Studio safely
Download OBS Studio from its official site. The OBS Quick Start Guide recommends running the Auto-Configuration Wizard, adding sources, checking audio, and running a test before the first real stream.
- Run the Auto-Configuration Wizard and accept settings that match your hardware and network.
- Create one scene with a camera, microphone, and only the screen sources you need.
- Check the audio meters while speaking. Mute desktop alerts and unrelated notifications.
- Connect OBS to YouTube using the current stream setup and protect the stream key like a password.
- Record a short local test. Watch it back for audio drift, exposed information, cropping, and dropped frames.


4. Prepare the live room
- Use a title and description that match what the stream actually contains.
- Set chat moderation, blocked words, and trusted moderators before the event.
- Do not display account numbers, addresses, private messages, or unreleased personal details.
- Obtain consent before recording guests and explain how clips may be reused.
- Keep a backup plan: a closing message, a local recording, and a way to tell viewers if the connection fails.
5. Check the stream before pressing Go Live
Preview the event in YouTube Studio. Check the title, visibility, thumbnail, audio, video, chat, and stream health. YouTube’s streaming tips recommend testing the network, leaving upload headroom, and verifying that the event is visible from the channel and watch page.
6. Review after the stream
- Confirm that the recording and archive settings match your plan.
- Review chat reports, moderation actions, and any privacy issue.
- Note dropped frames, audio problems, viewer questions, and the moments where viewers left.
- Correct factual mistakes in the description or follow-up post.
- Reset the stream key immediately if you think it was exposed.
Related PK Live guides
For a first-stream checklist, read How to Start Live Streaming. For interviews and audience questions, use the live interview and Q&A guide.
Sources and limits
Updated 20 August 2026. YouTube requirements, age rules, encoder support, and interface labels can change. Follow the current YouTube Help documentation and OBS documentation. This article does not guarantee approval, stream quality, viewers, or income.
Next: beginner setup | interview run-of-show.