Facebook Live has become an essential tool for individuals, businesses, and content creators looking to connect with their audience in real-time. Whether you’re streaming a product launch, hosting a live Q&A, or sharing a moment with friends, Facebook Live offers a dynamic platform to engage viewers. In this comprehensive guide, we’ll walk you through everything you need to know about Facebook Live—from registering and setting up your first live stream to best practices for engaging your audience.
Section 1: What is Facebook Live?
Facebook Live is a feature within the Facebook platform that allows users to broadcast live video to their followers, friends, or public audience. Introduced in 2016, Facebook Live has quickly become a go-to option for real-time video sharing, thanks to its accessibility and ease of use. The live video feature supports interaction with viewers through comments, reactions, and shares, making it a powerful tool for boosting engagement and reach on the platform.
Key Features of Facebook Live:
- Real-Time Interaction: Engage with your audience instantly through live comments and reactions.
- Wide Reach: Broadcast to your entire follower base or target a specific audience group.
- Post-Live Engagement: Save and share your live videos for continued interaction after the broadcast ends.
- Analytics: Access insights on viewer behavior, engagement metrics, and more to refine your live strategy.
Section 2: How to Register for Facebook Live
- Create a Facebook Account:
- To use Facebook Live, you first need a Facebook account. If you don’t have one, go to Facebook’s website and click “Sign Up.” You’ll need to provide your name, email or phone number, password, date of birth, and gender. Follow the on-screen instructions to complete the registration process.
- Set Up a Facebook Page or Group (Optional):
- While you can go live directly from your personal profile, creating a Facebook Page or Group is recommended if you’re a business, brand, or community leader. Pages are ideal for businesses and public figures, while Groups are perfect for community-oriented interactions.
- To create a Page, click on the “Create” button in the top right corner of Facebook and select “Page.” Follow the prompts to set up your Page with all necessary details.
- To create a Group, click on “Create” and select “Group,” then customize your Group settings according to your needs.
- Enable Facebook Live:
- By default, Facebook Live is enabled for all Facebook users. However, if you are using a Facebook Page, ensure that live streaming is allowed by navigating to Page settings and checking under “General” for any live restrictions.
Section 3: Setting Up Your First Facebook Live Stream
- Access the Facebook Live Interface:
- From a Profile: Log into your Facebook account, navigate to the top of your News Feed, and click on “Live Video” under the status update box.
- From a Page: Go to your Facebook Page, and under the “Create Post” section, click on “Live”.


- From a Group: In a Facebook Group, you’ll find the “Live” option under the “Create a Post” section.
- Configure Your Live Stream Settings:
- Title and Description: Write a compelling title and a detailed description of your live video. This information is crucial for attracting viewers and improving the discoverability of your stream.
- Tags: Add relevant tags to your live video to help it reach the right audience.
- Location (Optional): If your live stream is location-specific, you can add a location to help local viewers find your stream.
- Audience Settings: Choose your audience—Public, Friends, Friends except…, or Specific friends—for profile-based streams. For Pages, the default setting is Public, but you can target specific demographics through audience settings.
- Advanced Stream Options:
- Schedule a Live Video: If you want to go live at a later time, you can schedule your broadcast. Scheduled streams allow your audience to receive reminders, helping you build anticipation.
- Live Producer: For more advanced settings, use Facebook’s Live Producer tool. This tool provides additional options like streaming through a connected camera, using multiple cameras, and integrating third-party streaming software like OBS or Streamlabs.
Section 4: Going Live on Facebook
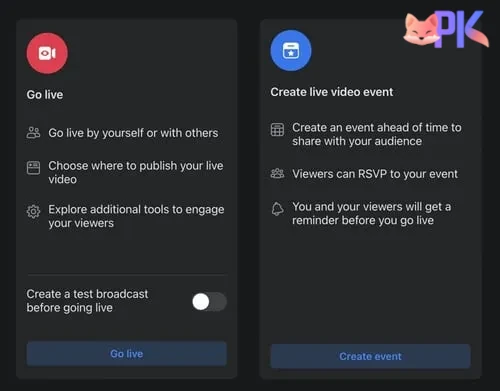
- Start Your Live Stream:
- Once you’ve set up your stream settings, click on “Go Live” to start broadcasting. Facebook will give you a short countdown before your stream begins.
- During the stream, monitor viewer comments, reactions, and the number of live viewers. Engage with your audience by responding to their comments and acknowledging reactions in real-time.
- Using Facebook Live on Mobile:
- Mobile Access: Open the Facebook app on your smartphone. Tap on “Live” located in the status update area for your profile, or go to your Page or Group to find the “Live” option.
- Streaming Options: Similar to desktop, you can add a title, description, and tags. The mobile interface allows you to switch between front and back cameras, add filters, or go live with a friend in a split-screen format.
- Using Facebook Live on Desktop:
- Live Streaming with Webcam: For desktop users, Facebook Live can be accessed via a connected webcam. Simply follow the same steps as above and choose your webcam as the video source.
- Using OBS or Third-Party Tools: For a more professional setup, you can use OBS or other third-party software to manage your live stream. These tools allow for more customization, such as adding overlays, using multiple cameras, and integrating with other platforms. You’ll need to copy your stream key from Facebook’s Live Producer and paste it into your streaming software.
Section 5: Best Practices for Facebook Live
- Engage with Your Audience:
- Interact with viewers in real-time by responding to comments, answering questions, and mentioning viewers by name. Encouraging audience participation increases engagement and retention.
- Use polls, Q&A sessions, or ask for viewer input to make your broadcast interactive.
- Monitor Stream Quality:
- Keep an eye on the live stream’s quality, including video clarity, audio, and connection stability. If you encounter issues, notify your viewers and try to resolve them as quickly as possible.
- Optimize for Discoverability:
- Use descriptive titles and tags that are relevant to your content. This helps in making your live stream discoverable by people who are not already following you.
- Promote Your Live Stream:
- Before going live, promote your stream through posts, stories, and other social media platforms to build anticipation. Share the scheduled stream link if you’ve set up a scheduled broadcast.
- Analyze Post-Stream Performance:
- After the live stream ends, review the analytics provided by Facebook. Metrics such as total views, peak live viewers, average watch time, and engagement rate will help you understand what worked and what didn’t, allowing you to refine your future live streams.
Section 6: Post-Stream Actions
- Save and Share Your Live Stream:
- Once your broadcast ends, Facebook will automatically save the video to your profile, Page, or Group. You can edit the post, change the title and description, and choose whether to keep the video public or limit its visibility.
- Share the saved live video across your social media platforms to reach a wider audience.
- Engage with Replay Viewers:
- Just because the live stream is over doesn’t mean the engagement has to stop. Respond to comments from viewers who watch the replay, and consider pinning important comments or adding annotations to highlight key moments.
- Repurpose Content:
- Consider repurposing your live video content into shorter clips, blog posts, or promotional material. This not only maximizes the content’s value but also helps reach different audience segments.
Conclusion:
Facebook Live is an incredibly powerful tool for engaging with your audience in real-time. By following this comprehensive guide, you can easily register for Facebook Live, set up your live streams, and leverage best practices to maximize engagement. Whether you’re a business looking to connect with customers, a content creator building your audience, or just sharing moments with friends and family, Facebook Live provides a versatile platform to broadcast your message.(PKLive)